Plugin Settings
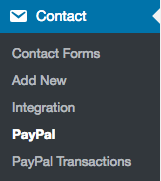
In the first step you should configure the Plugin settings. Therefore navigate to your admin panel and go to Contact -> PayPal. Or copy this URL: https://www.yourdomain.com/wp-admin/admin.php?page=Wordpress_Contact Form 7_Paypal_options_options. Make sure the required Plugins are installed!
 We are going to use PayPal’s sandbox first in order to test the functionality. Therefore you need a Developer Account and your PayPal Identity. To get an developer Account simply login with your normal PayPal login here: https://developer.paypal.com. Then go to the Accounts Page and create a Business and a Buyer Account.
Next is to get your PayPal Identity. So go ahead and login with the just created Sandbox Business Account here: https://www.sandbox.paypal.com or visit directly this link: https://sandbox.paypal.com/businessmanage/preferences/website. Make sure you check all required options inside this Panel:
- Activate Automatic Return (do not forget to put a URL there!)
- Activate the Payment data transfer. Then you will see your Identity below.
- Save it!
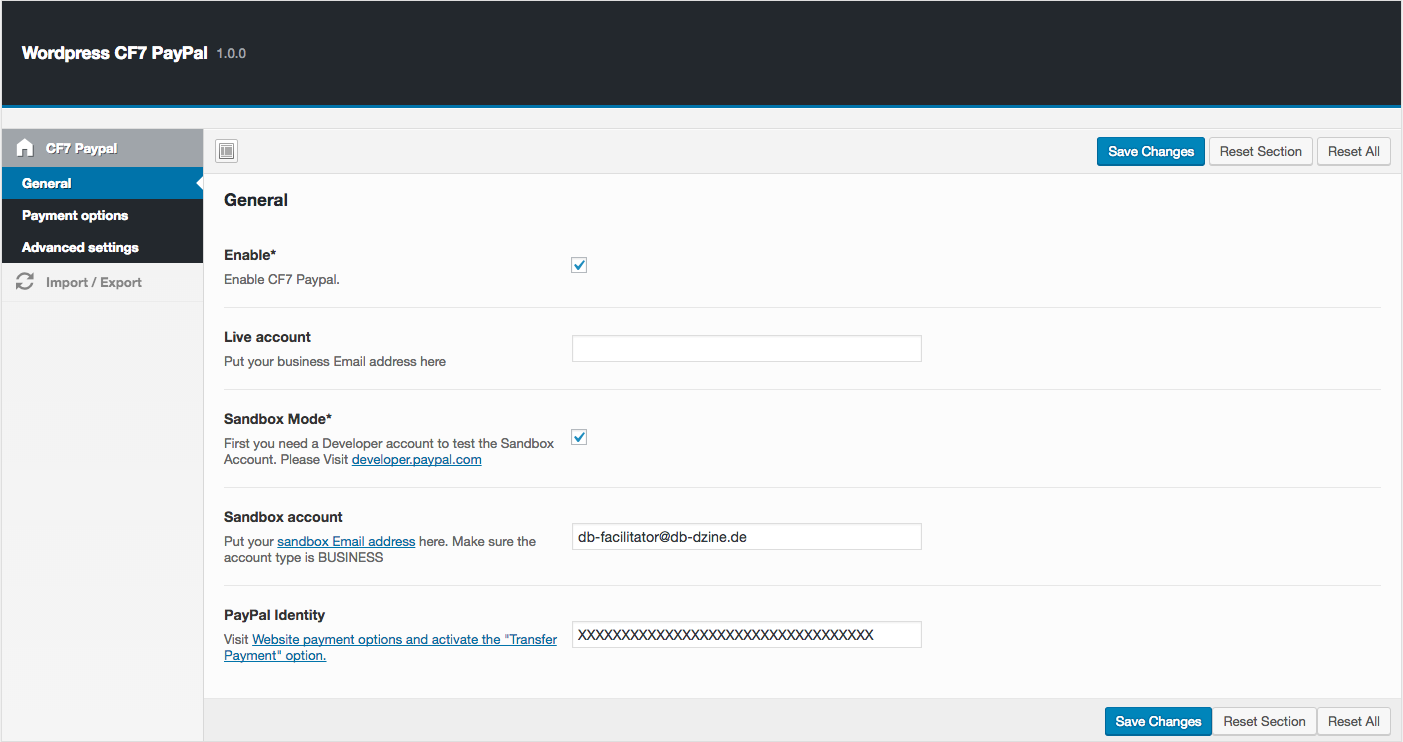
After Paypal is set up, go back to the plugin settings and:
- Enable the Plugin
- Enable the Sandbox Mode
- Enter your Sandbox Account (the Business, not the Buyer)
- Enter your PayPal Identity
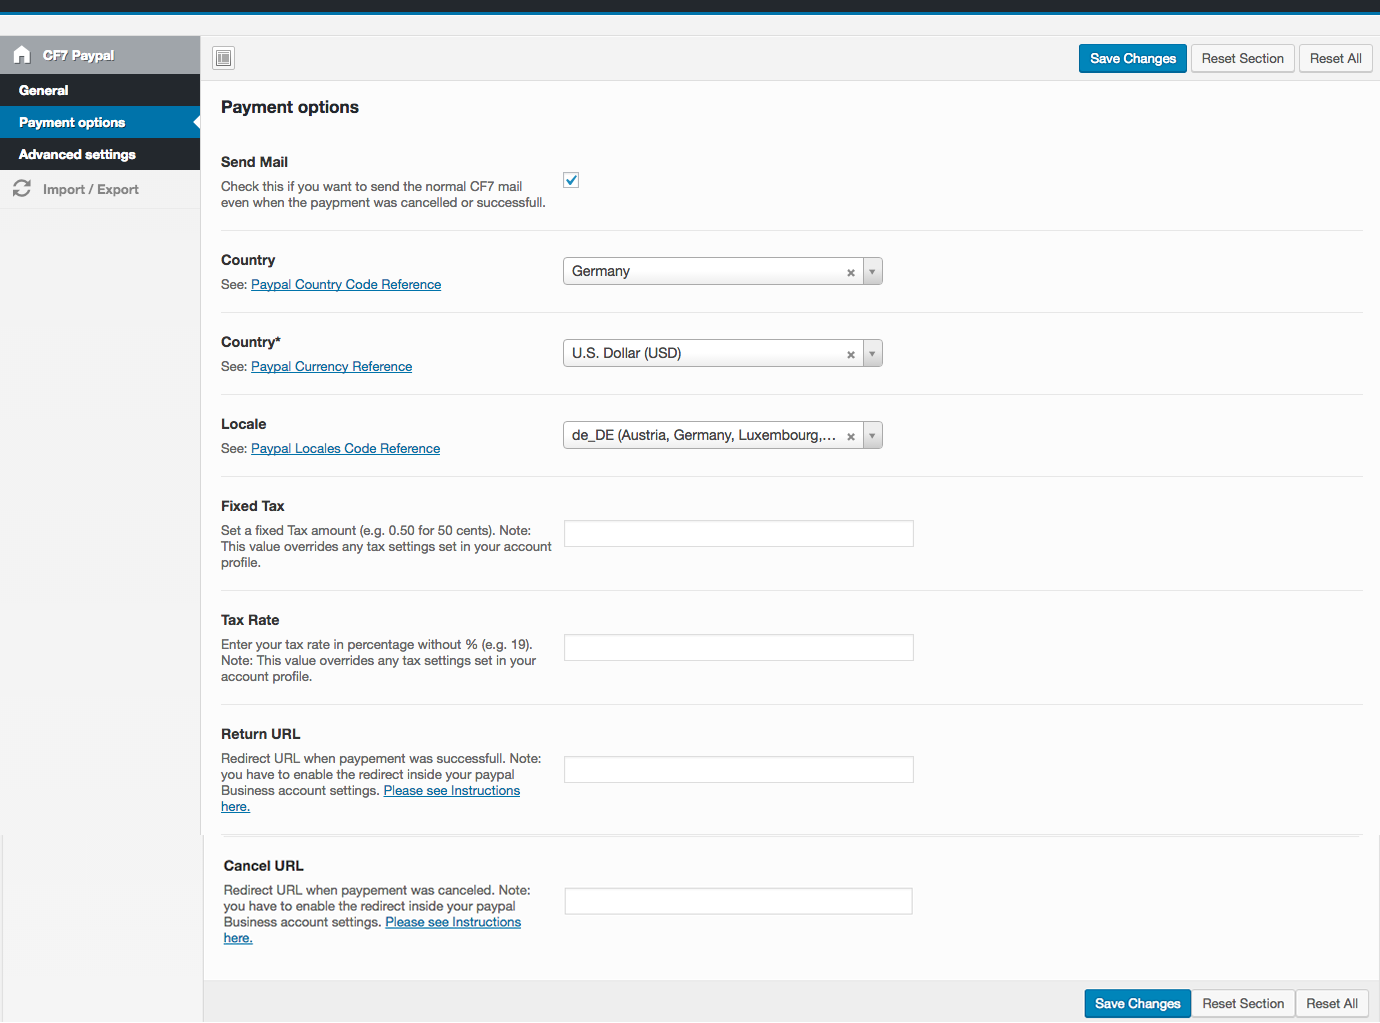
 Now we have to configure the payment options inside the 2nd Settings tab (see screenshot below). Here you have to …
- Set your Country
- Set your Currency
- Set your Locale
- Set your Fixed Tax
- Set your Tax Rate
- Set your Return URL
Make sure you have enabled the redirect inside your PayPal Business Account - Set your Cancel URL
Make sure you have enabled the redirect inside your PayPal Business Account
Create the Contact Form
After we have set up the Plugin Settings we can create our first Contact Form. Let us first say, that PayPal offers a huge amount of input fields, that can be added to your Contact Form. A full reference can be found here. But we will cover only the most important ones.
Customer Details
If you do not want to use the Customer Informations from the Buyers PayPal account you can override them with custom fields. For example the first name, lastname or the address. See the following example:
<h2>Your Contact</h2>
<p style="width: 50%; float:left;">Your First Name*<br />
    [text* first_name] </p>
<p style="width: 50%; float:left;">Your Last Name*<br />
    [text* last_name] </p>
<p style="width: 50%; float:left;">Your Name*<br />
    [text* last_name] </p>
<p style="width: 50%; float:left;">Your Email*<br />
    [text* email] </p>
<p style="width: 50%; float:left;">Your Address1*<br />
    [text* address1] </p>
<p style="width: 50%; float:left;">Your Address2*<br />
    [text address2] </p>
<p style="width: 50%; float:left;">Your City*<br />
    [text* city] </p>
<p style="width: 50%; float:left;">Your State*<br />
    [text* state] </p>
<p style="width: 50%; float:left;">Your Zip*<br />
    [text* zip] </p>
<p style="width: 50%; float:left;">Your Country (2 Digits)*<br />
    [text* country] </p>
The Products you want to sell
Next we will configure the product(s), that we want to sell. Because we use the PayPal Cart functionality we can setup unlimited items. One Item always consists of the following fields. XX always stands for the current ID of your product (e.g. 1 or 2).
- Item Name (item_name_XX) | Example: <input type=”hidden” name=”item_name_1″ value=”Product 1″>
- Item Number / SKU (item_number_XX) | Example: <input type=”hidden” name=”item_number_1″ value=”product-1-999″>
- Item Amount / Price (amount_XX) | Example: <input type=”hidden” name=”amount_1″ value=”10″>
- Item Quanitity (quantity_XX) | Example: [number quantity_1 min:1 class:fw max:10 “1”]
<h2>Your Order</h2>

<h4>Product 1 (SKU: 999)</h4>
<p><b>Price: 10 € / Unit</b></p>
<input type="hidden" name="item_name_1" value="Product 1">
<input type="hidden" name="item_number_1" value="product-1-999">
<input type="hidden" name="amount_1" value="10">Quantity:<br/>
[number quantity_1 min:1 class:fw max:10 "1"]
The PayPal Button
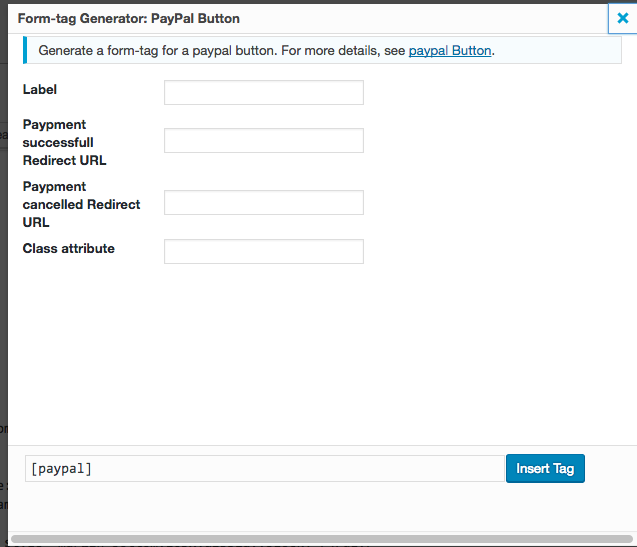
After youhave set up the “Data” we have to create the Buttons. Our Plugin is the only one that supports both Buttons: Either the normal “send just the formular”-Button (submit) or the “Pay with PayPal”-Button (paypal). In our example we will add both buttons. The normal submit button should be clear, so we skip this. The PayPal Button can be found in the tags bar (see Screenshot below).
 When you click on the Button you will get the Tag Generator Modal:
- Label (Button text) | Example: “Pay with PayPal”
- Paypment successfull Redirect URL (this overrides the Global URL) | Example: “https://www.yourdomain.com/custom-success-url/”
- Paypment cancelled Redirect URL (this overrides the Global URL) | Example: “https://www.yourdomain.com/custom-cancel-url/”
- Class attribute | Example: “paypal-button”
 Then we insert the tag and get the following Contact Form buttons
[paypal class:paypal-button return:https://www.yourdomain.com/custom-success-url/ cancel_return:https://www.yourdomain.com/custom-cancel-url/ "Pay with Paypal"]
[submit "Or send individual Request"]
We have added some divs and a product image to make the order form look a bit better. So here is the full contact form:
<h2>Your Contact</h2>
<p style="width: 50%; float:left;">Your First Name*<br />
    [text* first_name] </p>
<p style="width: 50%; float:left;">Your Last Name*<br />
    [text* last_name] </p>
<p style="width: 50%; float:left;">Your Name*<br />
    [text* last_name] </p>
<p style="width: 50%; float:left;">Your Email*<br />
    [text* email] </p>
<p style="width: 50%; float:left;">Your Address1*<br />
    [text* address1] </p>
<p style="width: 50%; float:left;">Your Address2*<br />
    [text* address2] </p>
<p style="width: 50%; float:left;">Your City*<br />
    [text* city] </p>
<p style="width: 50%; float:left;">Your State*<br />
    [text* state] </p>
<p style="width: 50%; float:left;">Your Zip*<br />
    [text* zip] </p>
<p style="width: 50%; float:left;">Your Zip*<br />
    [text* country] </p>

<h2>Your Order</h2>

<div class="row">
	<div class="col-sm-6">
		<img src="https://woocommerce.demos.welaunch.io/wp-content/uploads/2013/06/T_7_front-600x600.jpg" alt="Product 1">
		</div>
	<div class="col-sm-6">
		<h4>Product 1 (SKU: 999)</h4><p><b>Price: 10 € / Unit</b></p><input type="hidden" name="item_name_1" value="Product 1"><input type="hidden" name="item_number_1" value="999"><input type="hidden" name="amount_1" value="10">Quantity:<br/> [number quantity_1 min:1 class:fw max:10 "1"]

		[paypal class:fw "Pay with Paypal"]<div style="margin-bottom:10px;display:block;"></div>
		[submit class:fw "Or send individual Request"]
	</div>
</div>
Do a test
Let us test if the Contact Form works:
- Create a new Page
- Inser the Contact Form 7 Shortcode (in our case it is: [contact-form-7 id="529" title="Paypal Test"])
- Visit the Page
- Enter your Data
- Click the Pay with PayPal Button
- You should be redirected to PayPal
- Make sure you are on sandbox.paypal.com
- Now login with your Sandbox Buyer Account
- Pay the Bill
- The you should be redirect to your success page.
- Furthermore the Blog Admin will receive an Email, if a successfull transaction has been made!
Check the Transactions
If nothing went wrong, what we do not hope, then you can now look into the transactions overview. There you can find all transactions, that have been made through our Plugin. Note: This data is live fetched by PayPal and requires our Identity Key!
![]()
FEATURES
Settings Panel
Where can I find the Contact Form 7 PayPal settings?
You can find the everything inside your Admin Panel inside WooCommerce -> Contact Form 7 PayPal
General Settings
In the General settings are you have the following options:
- Enable:
Enable Contact Form 7 PayPal - Live account:
Put your business Email address here - Sandbox Mode:
First you need a Developer account to test the Sandbox Account. Please Visit developer.paypal.com - Sandbox account:
Put your sandbox Email address here. Make sure the account type is BUSINESS - PayPal Identity:
Visit Website payment options and activate the “Transfer Payment” option.
Payment Options
- Send Mail
Check this if you want to send the normal CF7 mail even when the paypment was cancelled or successfull. - Country
See: Paypal Country Code Reference - Currency
See: Paypal Currency Reference - Locale
See: Paypal Locales Code Reference - Fixed Tax
Set a fixed Tax amount (e.g. 0.50 for 50 cents). Note: This value overrides any tax settings set in your account profile. - Tax Rate
Enter your tax rate in percentage without % (e.g. 19). Note: This value overrides any tax settings set in your account profile. - Return URL
Redirect URL when paypement was successfull. Note: you have to enable the redirect inside your paypal Business account settings. - Cancel URL
Redirect URL when paypement was canceled. Note: you have to enable the redirect inside your paypal Business account settings.
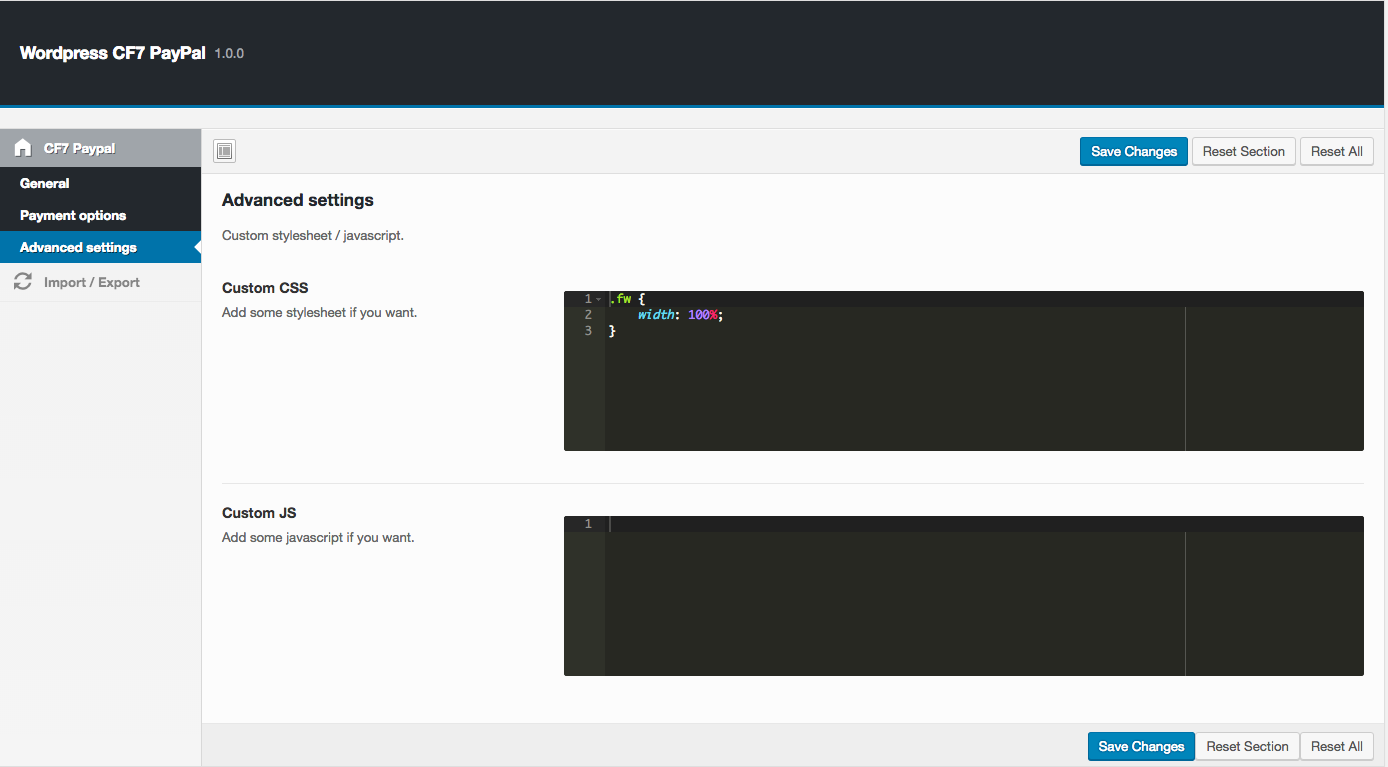
Advanced Settings
- Custom CSS
- Custom JS
TROUBLESHOOTING
Where can I find the Contact Form 7 PayPal settings?
You can find the everything inside your Admin Panel in Contact Form 7 PayPal -> Settings
I found a bug / got an error
Please make a comment on codecanyon. We will take care asap!
Hello,
Finally got the plugin working.
However, the old fashioned grey basic [PayPal Button] button clashes with modern themes. Is it possible to have the [PayPal button] button styled as per the theme buttons style? The [submit] button uses the theme button style. Can you make the [PayPal button] the same?
Alternatively, is there à CSS setting I can add to the Advanced Settings of the plugin to change the button style?
Thanks,
WK
WK
Not sure what you mean. If you look at our demo: https://demos.welaunch.io/wordpress-cf7-paypal/simple/ you can see that you can use any button you like.
Hi,
I’m confused about a few things.
1. I’m using Contact Form 7, and want to be able to pass a unique order number (which I’m generating with PHP and putting in a form field with no problem) and send it to PayPal so I can track payments against orders (emails). This could be embedded in the product description or could be a different field like an order number or whatever, as long as I can see it in the PayPal transaction history. Can your plug in do this for me?
2. I see you mention Woo-Commerce a lot. Does this mean I need to be using your plug in with Woo-Commerce to make your plug-in work? Or does it mean Woo-Commerce needs to be installed and activated? Or I don’t need WooCommerce at all?
3. Is the $15 license for a year or for life, and is it for one site, or for as many sites as I want to build?
Many thanks.
Ray
1) Yes of course
2) No WooCommerce is not be needed for our contact form 7 paypal plugin 😉
3) Its for lifetime including 6 months support
Can I have different currencies for different form ?
A specific currency for a specific form.
Thanks
That is not possible sorry.
Hi Team,
I have dynamic price with select input inside the contact form 7 like [select* selectpayment “$10” “$20” “$30”] and payment will taken as per customer selection payment. Is this possible with this plugin?
Yes but you should rename the field to “price”.
Like [select* price “$10” “$20” “$30”] right?
hello, can I get the transaction ID PAYPAL in the payment confirmation email sent by wordpress?
Thanks!
Hello and thanks for your support,
Unfortunately I was not yet able to get the payment running with sandbox. I have added the sandbox API information as well to the Section “API Settings”. Is that correct or shall it contain directly the live user API info? Otherwise I also do not get forwarded to paypal.
Can you please have a look with me? I can also provide access to our dev-domain
Best regards and thanks a lot,
Jennifer
Please send us wp-admin login to support@demos.welaunch.io
hey guys… short question… the form i submit with this plugin… when is the form / mail send?
example:
click buy / paypal / send button – mail now send – redirect to paypal – pay – paid / success redirect back to website
—— or ——-
click buy / paypal / send button – redirect to paypal – pay – paid / success redirect back to website – mail now send
You can set this up like you want. Either mail gets send all the time or only after a successful paypal payment was made.
ok, that sounds good… so is it possilbe to add a function like this and this will only be triggered after paypal succeed
add_action( ‘wpcf7_before_send_mail’, ‘my_custom_mail’ );
function my_custom_mail($WPCF7_ContactForm) {
$wpcf7 = WPCF7_ContactForm :: get_current() ;
$submission = WPCF7_Submission :: get_instance() ;
if($wpcf7->id == 100) { // 100 = ID of specific form
if ($submission) {
DO_SOMETHING_HERE ONLY AFTER PAYPAL SUCCEED
}
}
}
I am wondering the same thing. I have a Google sheet integration running at the moment and I need the data to be submitted after payment has been completed.
That could be possible yes.
Perfect!
How to set this up?
Is your plugin set up in a way that the submission is delayed until payment is completed? Or is just the email delayed if that option is checked?
In other words, will it work out of the box, or are there any other adjustments that need to be made before getting this submission delay to work?
It works out of the box.